Translate Project
New projects are opened automatically for translation. To continue work on a closed
project:
- In Projects tab, click the project that you want to translate.
- Select from the main menu or click the
 button on the toolbar of the Projects tab.
 |
NoteYou can also double-click on a project in the Projects tab to open
it for translation.
|
A project opened for translation looks like this:
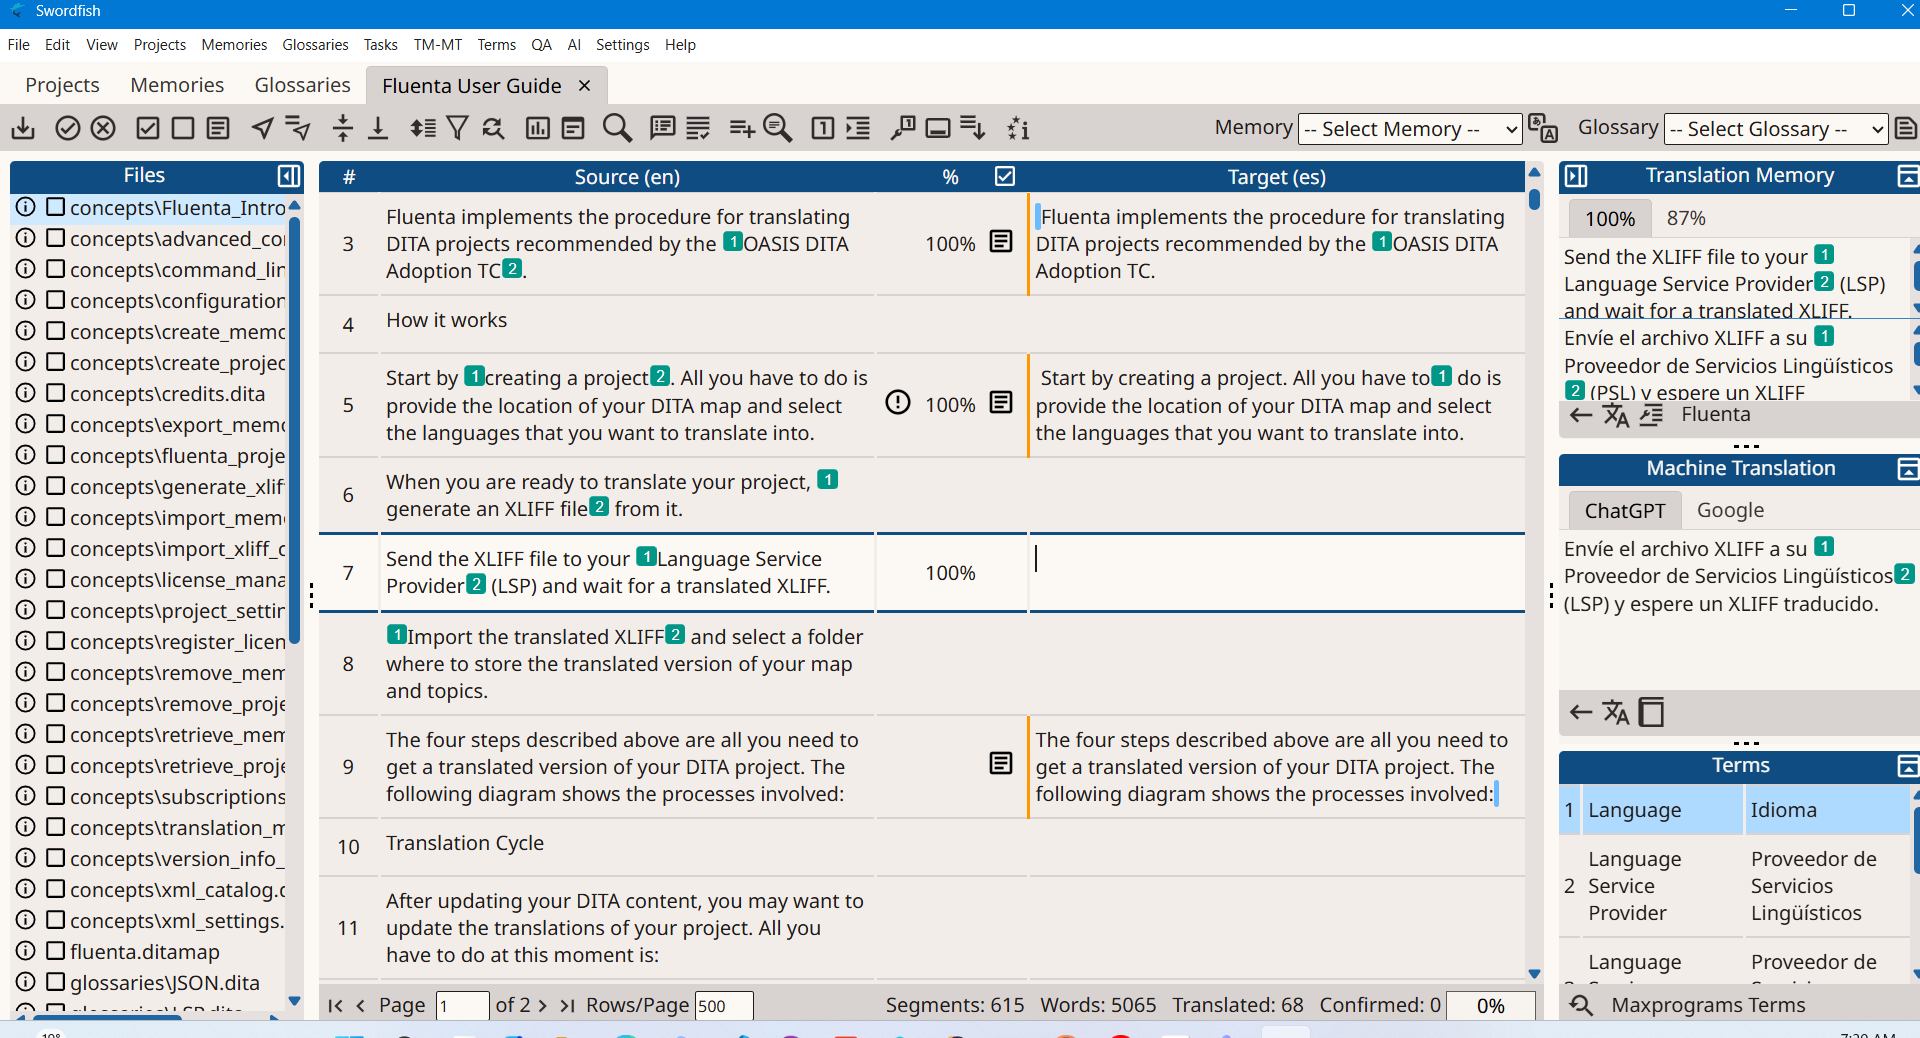
The translation view has these special areas:
| Top Toolbar | Contains an array of buttons for performing different tasks. It also contains drop-down selectors for the active memory and glossary. |
| Files Panel | Located on the left side, this panel contains the list of files that are part of the project. |
| Translation Panel | Large scrollable table of segments, showing source text, segment status and translation. |
| Right Side Panel | This section holds three sub-panels: Translation Memory, Machine Translation and Terms. |
| Navigation and Status Bar | Located at the bottom, this area contains buttons for navigating between project pages and provides translation status information. |
Use ([Ctrl+Shift+F] on Windows/Linux,
[Cmd+Shift+F] on macOS) to show or hide the Files Panel, and
([Ctrl+Shift+J] on Windows/Linux,
[Cmd+Shift+J] on macOS) to show or hide the right side panels. To
close the active translation tab, select ([Ctrl+W] on Windows/Linux,
[Cmd+W] on macOS).
Click on a segment to start translating it. The corresponding row is highlighted and
centered
on screen (whenever possible) and the cursor is positioned at the start of target
text.
To save changes to the current segment without confirming it, select ([Alt+Enter]) from the main menu. To discard changes and
restore the segment to its previous state, select ([Esc]).
To copy the source text to the target of the current segment, select ([Ctrl+P] on Windows/Linux,
[Cmd+P] on macOS) from the main menu. To copy the source text to the
target of all empty segments at once, select ([Ctrl+Alt+P] on Windows/Linux,
[Cmd+Alt+P] on macOS).
To change the case of the selected text in the target, select ([Ctrl+Alt+C] on Windows/Linux,
[Cmd+Alt+C] on macOS) from the main menu.
Source formatting is represented with green marks containing a number (i.e.:  ). To insert green marks, also known as inline tags, press [Ctrl+N] on Windows/Linux,
([Cmd+N] on macOS) where N is the number in
the mark. You can also use the different options for managing tags from Edit menu:
). To insert green marks, also known as inline tags, press [Ctrl+N] on Windows/Linux,
([Cmd+N] on macOS) where N is the number in
the mark. You can also use the different options for managing tags from Edit menu:
). To insert green marks, also known as inline tags, press [Ctrl+N] on Windows/Linux,
([Cmd+N] on macOS) where N is the number in
the mark. You can also use the different options for managing tags from Edit menu:- ([Ctrl+T] on Windows/Linux,
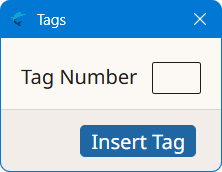
[Cmd+T] on macOS): displays a window for writing the tag number.
Press the Esc key to close the dialog at any time. Use this option
when the number is greater than 10.
- : opens a submenu for inserting tags 1 to 10.
- ([Ctrl+Shift+T] on Windows/Linux, [Cmd+Shift+T] on macOS): inserts the tag that follows the highest tag number inserted so far.
- ([Ctrl+Alt+T] on Windows/Linux, [Cmd+Alt+T] on macOS): inserts all tags from source that are not present in target text.
- ([Ctrl+Alt+Shift+R] on Windows/Linux, [Cmd+Alt+Shift+R] on macOS): removes all tags present in target text.
|
NoteIn case there are tag errors or initial/trailing spaces errors in a segment, a warning
icon (
 ) is displayed in the center column of the Translation Panel
when the segment is confirmed. ) is displayed in the center column of the Translation Panel
when the segment is confirmed. |
When the segment is fully translated, press [Ctrl+E]
([Cmd+E] on macOS) or click the  button on the top toolbar to confirm it. When you confirm a segment, its translation
is stored in the memory selected in the Memory drop-down of the top
toolbar and is also automatically propagated to all similar unconfirmed segments.
button on the top toolbar to confirm it. When you confirm a segment, its translation
is stored in the memory selected in the Memory drop-down of the top
toolbar and is also automatically propagated to all similar unconfirmed segments.
button on the top toolbar to confirm it. When you confirm a segment, its translation
is stored in the memory selected in the Memory drop-down of the top
toolbar and is also automatically propagated to all similar unconfirmed segments.You have two more options for marking a segment as confirmed:
- Press [Alt+Down Arrow] ([Ctrl+Alt+Down
Arrow] on macOS) or click the
 button on the top toolbar to Confirm and go to Next Untranslated
segment.
button on the top toolbar to Confirm and go to Next Untranslated
segment. - Press [Alt+Shift+Down Arrow] ([Ctrl+Shift+Down
Arrow] on macOS) or click the
 button on the top toolbar to Confirm and go to Next Unconfirmed
segment.
button on the top toolbar to Confirm and go to Next Unconfirmed
segment.
To remove the confirmed status from a segment, select ([Ctrl+Shift+E] on Windows/Linux,
[Cmd+Shift+E] on macOS) from the main menu.
The following batch operations are also available from the Tasks
menu:
- : marks all segments in the project as confirmed.
- : removes the confirmed status from all segments in the project.
- : deletes the target text of all unconfirmed segments in the project.
Use [Page Up] and [Page Down] keys to move to
next and previous segments and translate them.
When a project contains more segments than fit on a single page, use the following
options
from the View menu to navigate between pages:
- ([Ctrl+Shift+Page Up] on Windows/Linux, [Cmd+Shift+Page Up] on macOS)
- ([Ctrl+Page Up] on Windows/Linux, [Cmd+Page Up] on macOS)
- ([Ctrl+Page Down] on Windows/Linux, [Cmd+Page Down] on macOS)
- ([Ctrl+Shift+Page Down] on Windows/Linux, [Cmd+Shift+Page Down] on macOS)
Use the following options from the Edit menu to jump directly to
segments that require attention:
- ([Ctrl+U] on Windows/Linux, [Cmd+U] on macOS): moves to the next segment that has no target text.
- ([Ctrl+Shift+U] on Windows/Linux, [Cmd+Shift+U] on macOS): moves to the next segment that has not been confirmed.
- ([Ctrl+Alt+U] on Windows/Linux, [Cmd+Alt+U] on macOS): moves to the next segment that is either unconfirmed or has no target text.
When all segments have been translated, on main menu select ([F5]) or click on the  button on the top toolbar to export an HTML version of your translations for review.
Note any segments with errors and correct them.
button on the top toolbar to export an HTML version of your translations for review.
Note any segments with errors and correct them.
button on the top toolbar to export an HTML version of your translations for review.
Note any segments with errors and correct them.To visit a segment knowing its number, in main menu select , click on the  or press [Ctrl+G] ([Cmd+G] on macOS).
The Go To Segment dialog appears:
or press [Ctrl+G] ([Cmd+G] on macOS).
The Go To Segment dialog appears:
or press [Ctrl+G] ([Cmd+G] on macOS).
The Go To Segment dialog appears: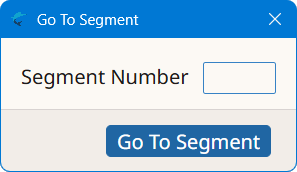
Type the number of the segment you want to review in the Segment
Number box and click the Go To Segment button.
To jump to the previous segment that has the same source text as the currently selected
segment,
select ([Ctrl+Alt+G] on Windows/Linux,
[Cmd+Alt+G] on macOS) from the main menu.
To jump to the next segment that has the same source text as the currently selected
segment,
select ([Ctrl+Shift+G] on Windows/Linux,
[Cmd+Shift+G] on macOS) from the main menu.
|
NoteSegments that have duplicated source text are marked with this icon in the translation
panel:
 . . |
Finally, use the Check Inline Tags [F9] and
Check Initial/Trailing Spaces [F10] options
from QA menu to check that your file is properly translated. Pay
special attention to errors in tags, because the translated document may become unusable.
‣ Parent topic: Projects