Convert Excel File to GlossML Format
Follow these steps to convert an Excel workbook to a GlossML glossary.
About this task
Use this task to turn terms kept in an Excel workbook into a glossary.
Procedure
- Select from the main menu.The Convert Excel to GlossML dialog is displayed:
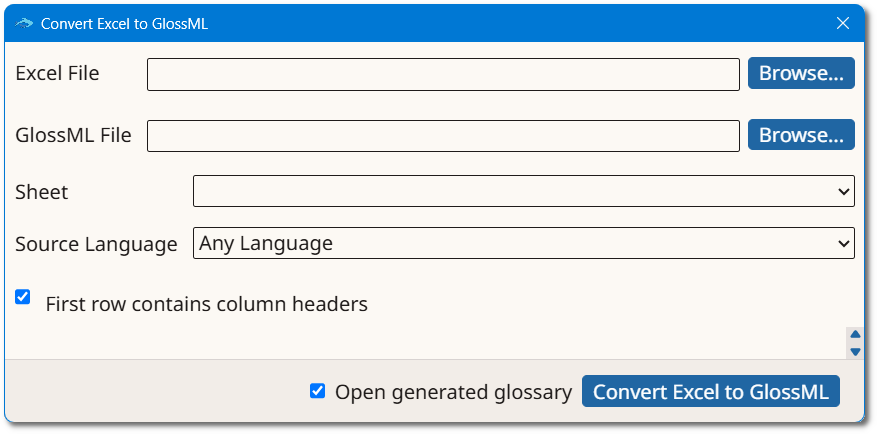
- Type the name of the Excel file in the Excel File box or click the Browse... button next to it to select an existing workbook from the file system.
- Type the name of the glossary to create in the GlossML File box or click the Browse... button next to it to select a name and location.
- Select the worksheet to convert from the Sheet drop-down list.
- Select the default language of the terms from the Source Language drop-down list.
- Optionally, select the First row contains column headers
checkbox.If the file was previously exported by Anchovy, selecting this option recognizes Anchovy's own header row and assigns each column's type and language automatically, which makes round-tripping a glossary easy. Anchovy does not interpret headers from files produced by other programs; for those, the column types must be assigned manually in the preview.
- The preview table at the bottom of the dialog shows the data of the selected
sheet split into columns. Set the type of each column using the selector in its
header.
Option Description Skip The column is ignored and not imported. Comment The column holds comments about the entry. Only one column can be mapped as Comment. Term The column holds terms. At least one column must be mapped as Term. Definition The column holds definitions. For Term and Definition columns, also select the language of the column. The Source Language is used as the default.The preview reflects the assigned column types: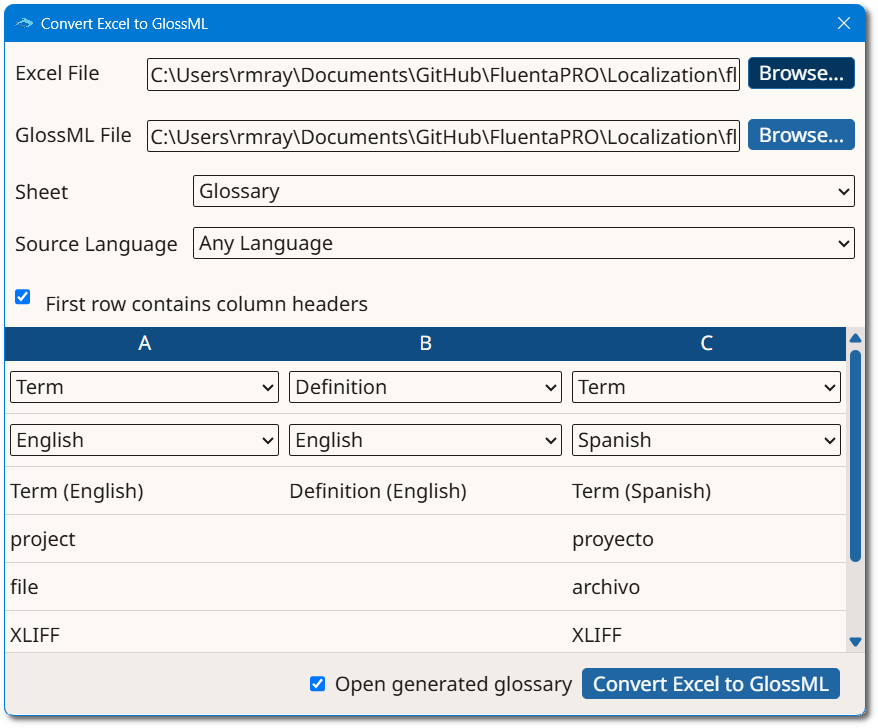
- Optionally, select the Open generated glossary checkbox to open the new glossary in Anchovy after conversion.
- Click the Convert Excel to GlossML button.
Results
A new glossary is created and stored in the selected location.