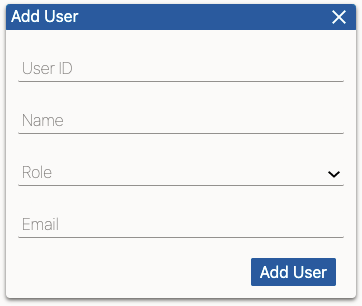
Add User
Follow these steps for adding a new RemoteTM user.
Procedure
- Click in main toolbar.The Manage Users dialog appears.
- In the Manage Users dialog, click the Add
User button.The Add User dialog appears:

- Type a unique identification code for the new user in the User
ID text input.Only Latin characters, numbers, underscores or the '@' sign should be used in a User ID.
- Type the name of the user in the Name text input.
- Select a role for the user from the Role drop-down list.
Available options are:
Option Description System Administrator User that can manage the RemoteTM server without restrictions. Project Manager User that can create translation memories and assign use rights to other users. Translator User with access restricted to assigned translation memories. - Type the email address to use for sending notifications to the user in the
Email text input.

Important
If the email address of the user is invalid, sending the initial login credentials will fail and the user will not be created. - Click the Add User button.