Import TMX
Steps for importing TMX files into a translation memory using RemoteTM's web interface.
About this task
Procedure
- Select a memory on the main list by clicking on it.
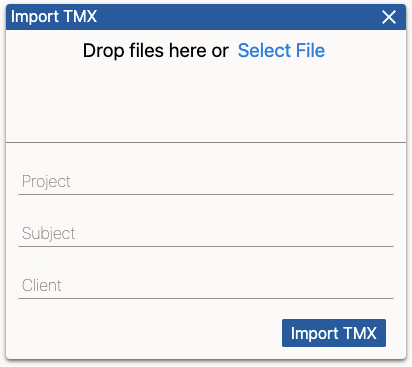
- Click the Import TMX button on the main toolbar.The Import TMX dialog appears:

- Drag a TMX file from your computer and drop it on the top area of the Import TMX dialog. Alternatively, click on the Select File link to open a dialog for selecting a file from your computer.
- Optionally, type a project description in the Project text input.
- Optionally, type a subject for the TMX data in the Subject text input.
- Optionally, enter a client name in the Client text box.
- Click the Import TMX button.