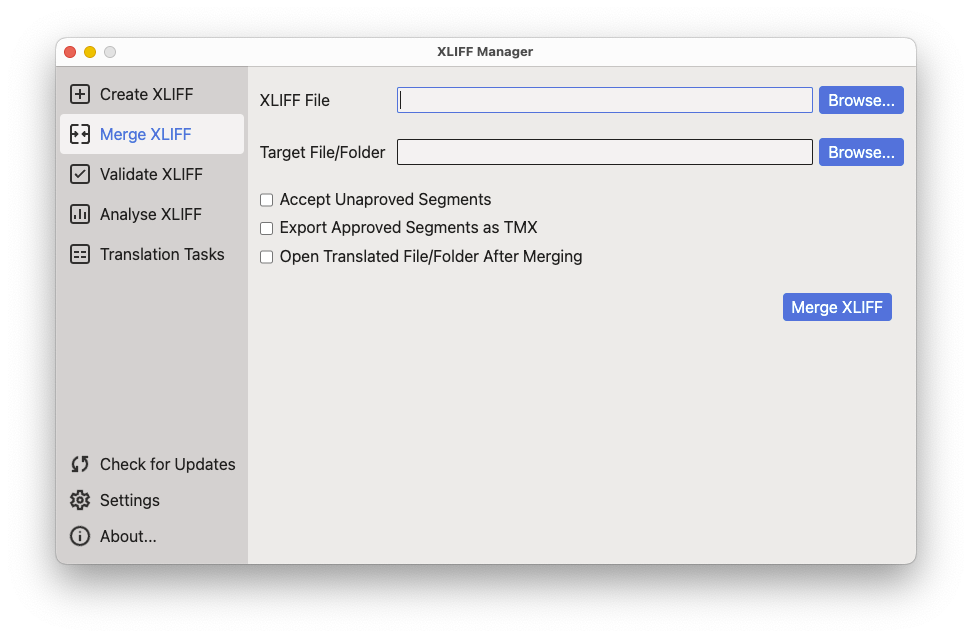
Merge XLIFF File
About this task
Use the Merge XLIFF panel to convert an XLIFF file to original format.
XLIFF Manager can only merge XLIFF files that it generated or XLIFF files created
with other tools that use OpenXLIFF Filters.

Procedure
- In main menu, select or click the
 Merge XLIFF
option on the left panel.
 - Type the name and location of the XLIFF file to merge in the XLIFF
File text box or click the Browse...
button next to it to select an XLIFF file from the file system.If you use the Browse... button to locate the XLIFF file, the program tries to automatically generate a suitable target file or folder.
- Type the name of the translated file or folder for translated documents in the
Target File/Folder text box or click the
Browse... button next to it to select a file or
folder.If the XLIFF file contains multiple documents inside, a folder is required to place all translated files in it. This is usually the case when the XLIFF was created from a DITA Map.
- Select the Accept Unapproved Segments checkbox if you
want to consider all segments as translated, even when the
@approvedattribute is not set to "yes". - Select the Export Approved Segments as TMX checkbox if you want to generate a TMX file from the XLIFF file.
- Select the Open Translated File/Folder After Merging checkbox if you want to automatically open the translated document or folder after a successful merge operation.
- Click the Merge XLIFF button.XLIFF Manager merges the indicated file.