Translate Single File
Follow these steps to create a translation project from a single file.
Procedure
- Select the file to translate:
- Select ([Ctrl+O] on Windows/Linux,
[Cmd+O] on macOS) from the main menu or click the
 button on the toolbar of the Projects tab. Use the
dialog displayed by the Operating System to select a file.
button on the toolbar of the Projects tab. Use the
dialog displayed by the Operating System to select a file. - Drag a file and drop it in the Projects tab.
Once you have selected a file, the Translate File dialog appears: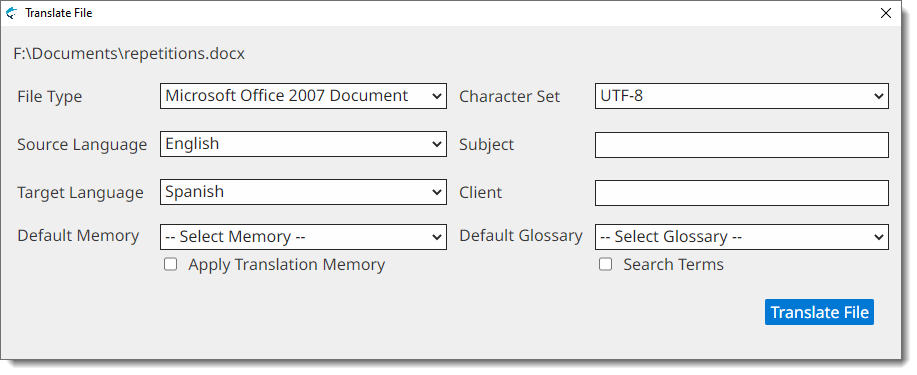
- Select ([Ctrl+O] on Windows/Linux,
[Cmd+O] on macOS) from the main menu or click the
- Complete the fields of the Translate File dialog:
- If Swordfish has not detected the right document, select it using the File Type drop-down.
- If Swordfish has not detected the character set for the document automatically, select it using the Character Set drop-down.
- Select the source language of your project using the Source Language drop-down.
- Select the target language of your project using the Target Language drop-down.
- Optionally, enter a subject description for the new project in the Subject box, or select an existing value from the drop-down list.
- Optionally, enter a client name for the new memory in the Client box, or select an existing value from the drop-down list.
- Optionally, select a memory for storing your translations using the Default Memory drop-down.
- Optionally, select the Apply Translation Memory checkbox to incorporate Translation Memory matches from Default Memory into your project.
- Optionally, select a glossary for checking terms at translation time using the Default Glossary drop-down.
- Optionally, select the Search Terms checkbox for fetching all known terms from the Default Glossary before starting the translation task.
- Click the Translate/Review File button.
Results
A project creation process is started. Once the project is ready, it is opened for
translation.